Payment Kajitas
Learn how to create and use the payment Kajitas
The task of Kajita is to collect your customer’s payment data and transfer it to a token, creating a unique identifier that represents the intention to generate an upcoming payment.
In this article we show you the steps to create a payment Kajita, configure it and add it to your website. With that, you will be ready for the first step of a transaction: receiving your customer’s payment data and generating a payment intent token. Once you get this token, you will be able to execute transactions from your back-end, using Kushki’s API services.
How to create a payment form or Kajita?
Prerequisites
To create a Kajita or payment form you must have the role of Master User in the administration console of your business.
Steps
Follow the instructions below to create a payment Kajita from the console and obtain its script for it to implement on your front-end.
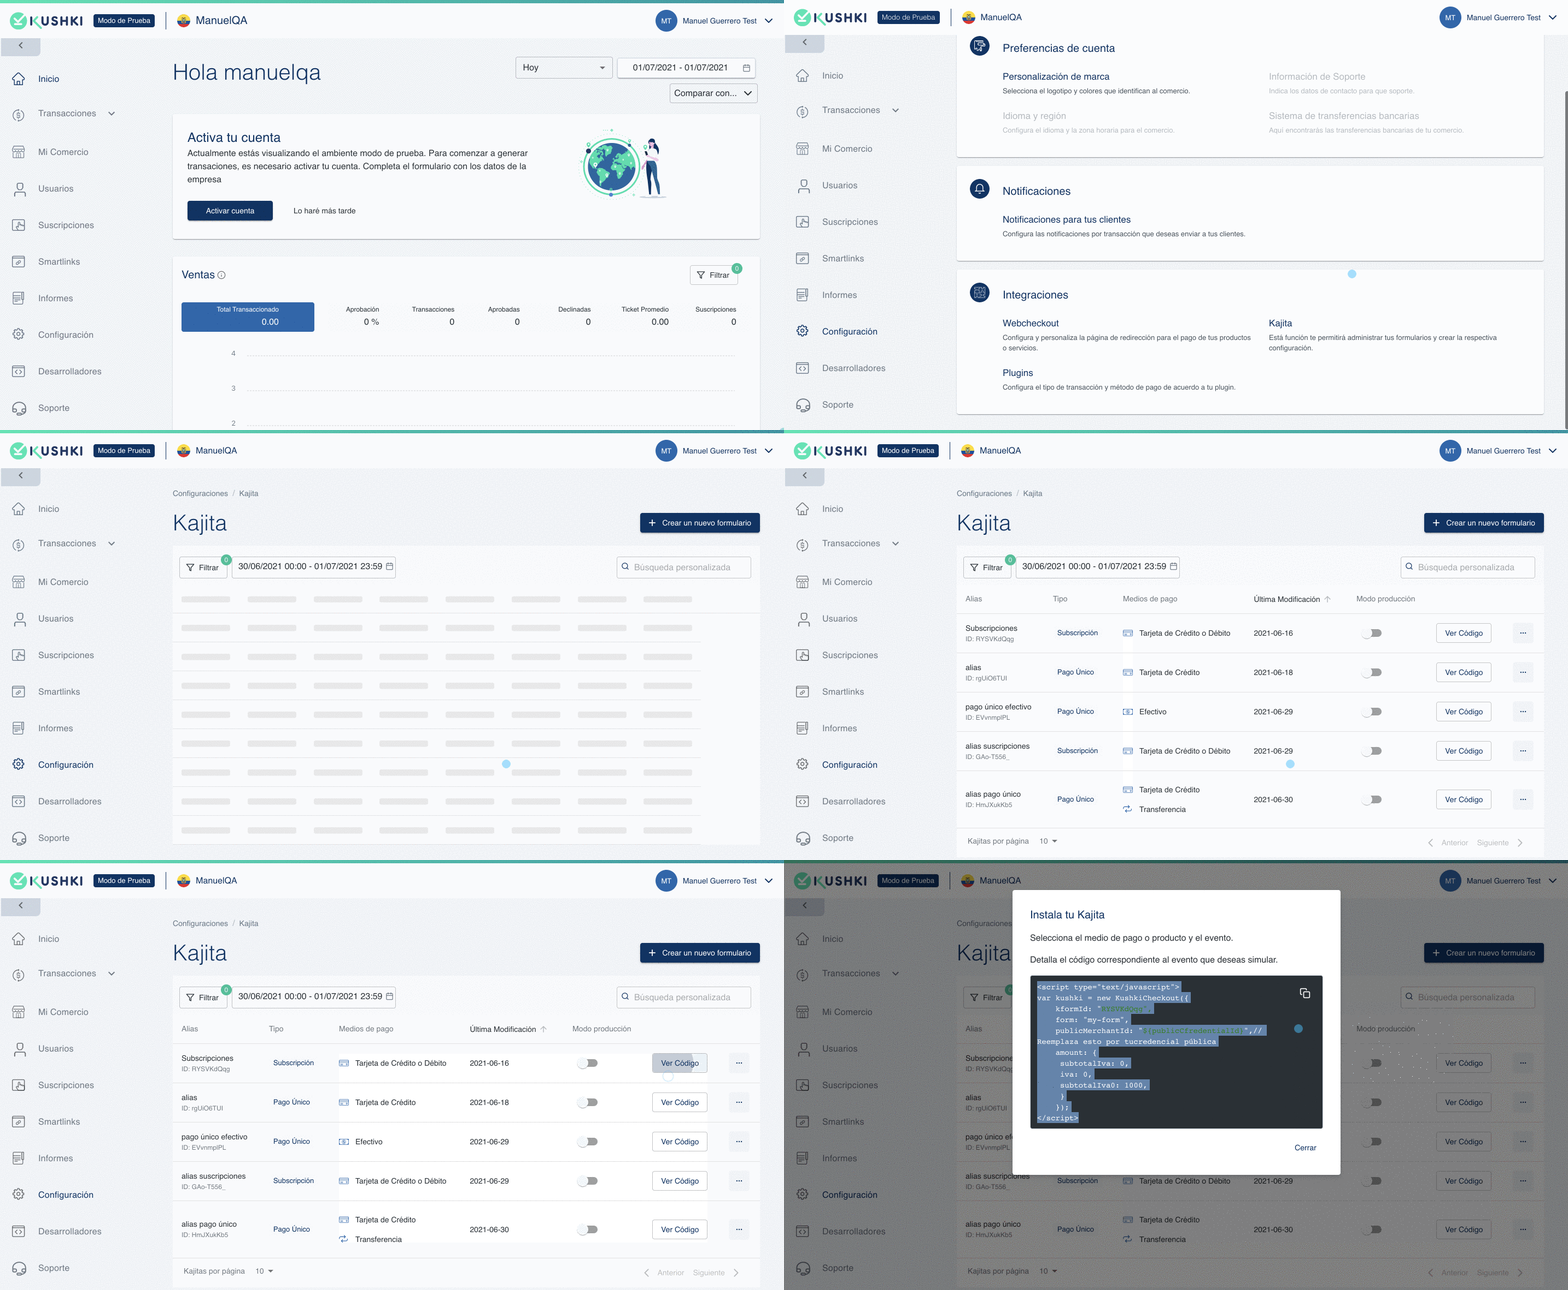
- Log in with your credentials https://console.kushkipagos.com/auth if you are going to create a Kajita for a production environment or https://uat-console.kushkipagos.com/auth, to use a test environment.
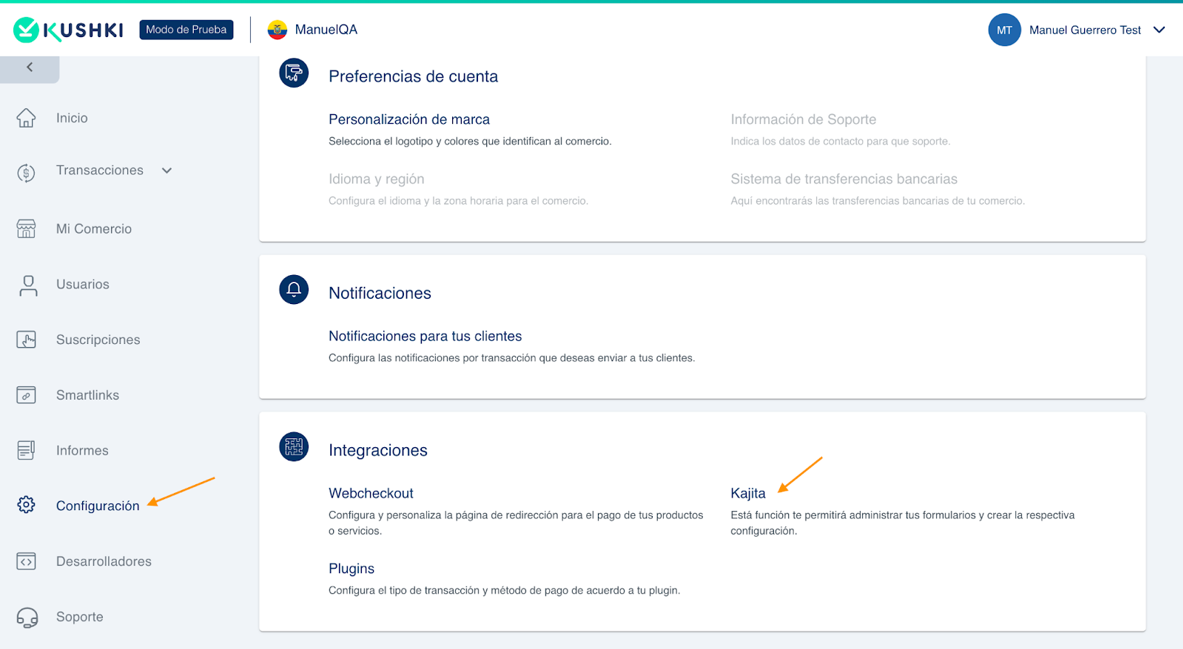
- Click on the Configuration option from the left side menu. Several configuration options for your business will appear.
- Click Kajita from the Integrations section. A window called Kajita will open. In case you have already created Kajitas, you will see the detail of these.

- Click the +Create a new form button and select the type of form you want to create: one-click payments or subscriptions form. For this example, we select the OnePayment option. A window will open to configure your payment form.
- In the Test Form window, configure the fields of your payment forms:
- Alias: Set up your Kajita’s alias. Since you will have the possibility to create more than one form, the alias will help to identify the form and search for it from the summary of Kajitas created.
- Payment options: you will have the possibility to configure the means of payment that you want to show your customers. In case you require it, you can include a payment method selection window in your form. In the case of payment forms for subscriptions, you will have the possibility to configure the regularity of charges, the number of charges, and even add different predefined plans for your user to select the one of their preference.
- Fields: according to the payment methods you have selected in the previous configuration, you will be able to select which fields will be requested from your clients, assign the label and the placeholder that will appear when your clients complete their data.
Activating Apple Pay in Quick Payment Methods (Beta Phase)
The option to enable Apple Pay is located in the Quick payment methods with card section.
For this option to be available:
- You must have selected the Credit or Debit Card option under the main Payment Options.
- Once selected, activate Apple Pay in the Quick payment methods with card subsection.
- Important: This functionality requires the prior configuration and validation of your domain in the Kushki Console, under Configuration > Integrations. Click here for more information.
- Additional settings: you will be able to set the default language, the currency (in case there is more than one currency available for your country) and add a Callback URL, if needed. The callback URL only applies for payments with redirection, that is, payments that need to be completed in an external environment to your merchant’s site (either in a bank or another platform). In this sense, this URL will be where customers will return to once they complete the payment process on an external site, in cases where a redirection is required.
- Click on Save form to finish. The system will direct you to the Configurations> Kajita window. From there you can see the created form and its details.
The following video will guide you through the process of creating a payment form:
Customize your payment form (Optional)
Kushki allows you to customize your forms according to the styles of your company. You will be able to customize aspects such as form orientation, colors, themes, fields and button texts.
- Login with your credentials to https://console.kushkipagos.com/auth or https://uat-console.kushkipagos.com/auth, to use a test environment.
- Click on the Configuration option from the left side menu. Several configuration options for your business will appear.
- Click Kajita from the Integrations section. A window called Kajita will open. In case you have already created Kajitas, you will see the detail of these.
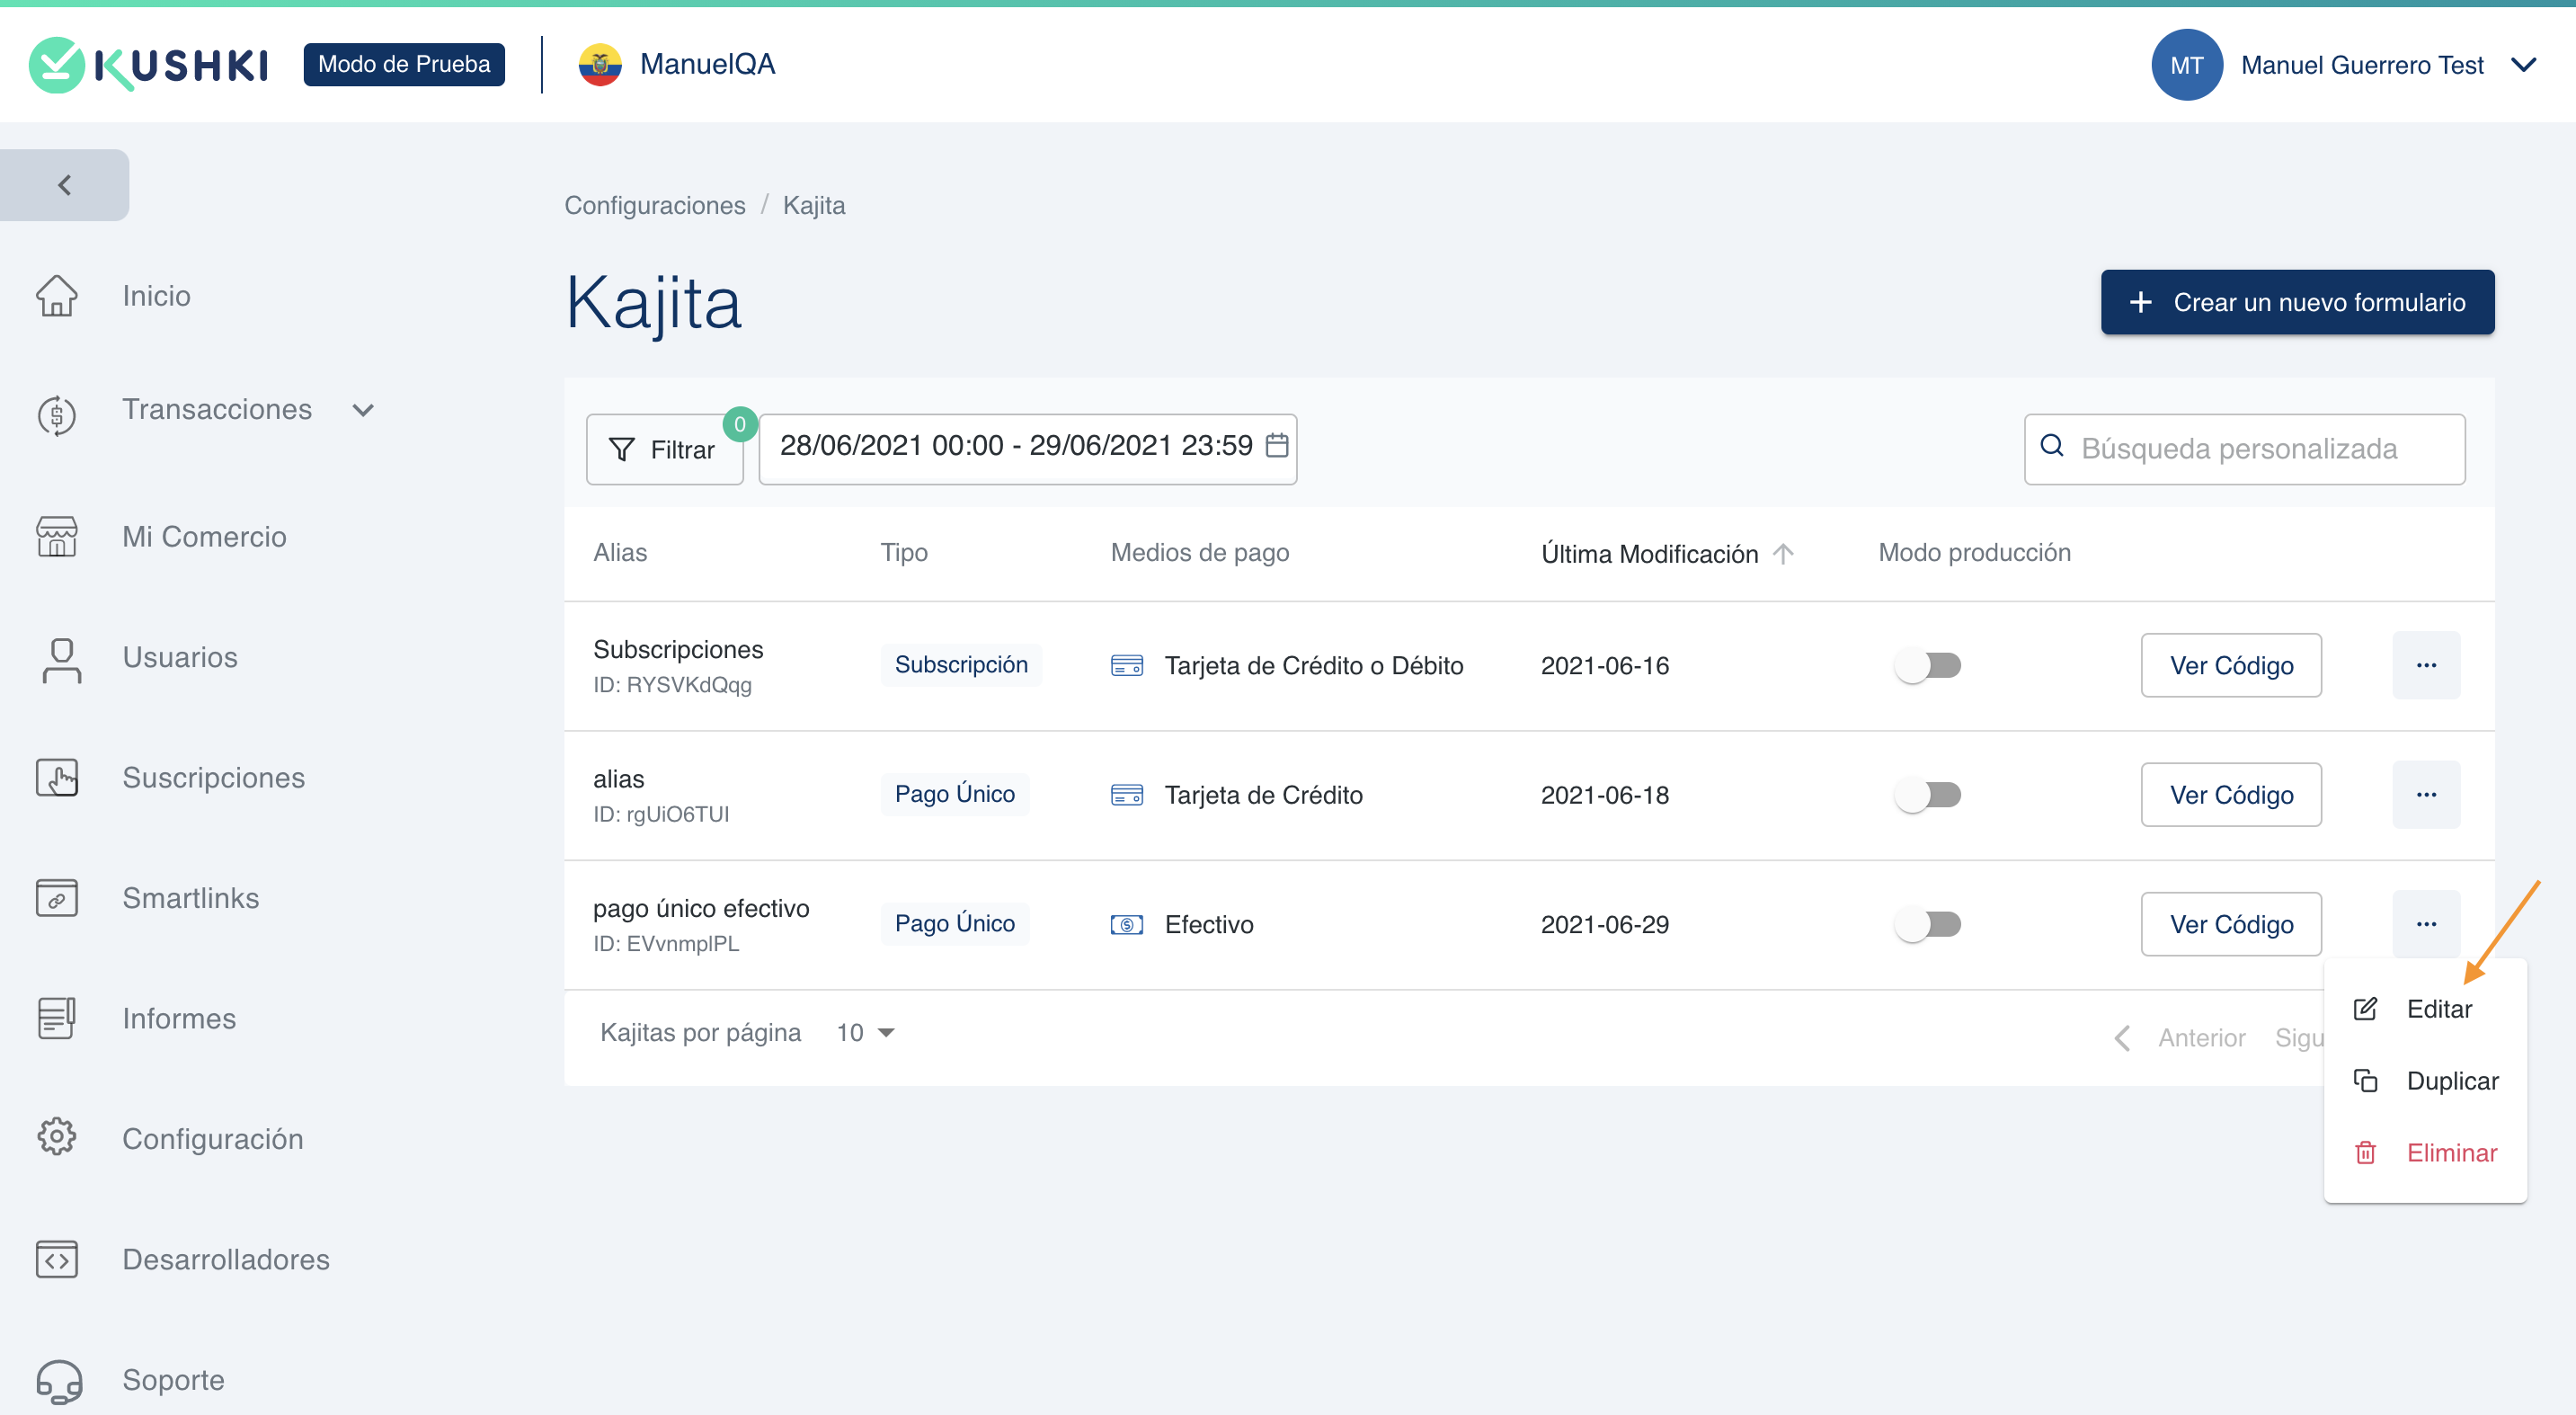
- Click on the more options button and then click Edit. A configuration window for your form will open.

- Click on the Style option from the top left of the screen. You can configure the following options:
- Orientation: you can choose whether you want to display your form horizontally or vertically.
- Theme: you can choose if you want to configure your form in night mode (Night) or day (Light). In case you have dark mode detection from your application in React, you can activate the option Automatic detection of night mode.
- Templates: from this option you can configure the styles of the form fields, assign a primary and secondary color and a color for error messages.
- Additional Styles: Enter the style of the payment button and the text that will appear on the button. In the case of subscriptions, you can edit it to say for example Save Card or Subscribe.
- Click Save Form to finish your customizations.
How to integrate a Kajita in your front end?
To integrate a Kushki Kajita in your front-end, follow the following steps:
1. Import Kajita
Embed kushki-checkout.js script in your payment page by adding it to the <head> of your HTML file. Always load kushki-checkout directly from cdn.kushkipagos.com to ensure that you comply with the PCI standard. Do not include the script in a bundle or package or host a copy of it.
<head><title>Checkout</title><script src="https://cdn.kushkipagos.com/kushki-checkout.js"> </script></head>
2. Add Kajita to your website
Kajita needs a place to live on your page. Enter the following code in your website’s <body>, where you want the payment form to be displayed.
<form action="/checkout/token" method="post" id="my-form"><input type="hidden" name="cart_id" value="123"></form>
It is important that you specify the action URL, which is where Kushki will return to with the generated token.
You can add information to identify the transaction. In this case cart_id was used.
3. Obtain the script of your Kajita
3.1. From the Administration Console go to Configuration>>Integrations and click on Kajita. You can see the forms (Kajitas) available in your business. 3.2. Click the View Code button. A window will open with the script that corresponds to the selected Kajita. 3.3. Copy the Kajita code as shown in the following GIF:

4. Add the script of your Kajita
Finally, add the Kajita script copied in the previous step on the <body> of your website.
<script type="text/javascript">var kushki = new KushkiCheckout({kformId: "HmJXukKb5",form: "my-form",publicMerchantId: "${publicCfredentialId}",// Replace this with your public credential.amount: {subtotalIva: 0,iva: 0,subtotalIva0: 1000,}});</script>
Token reception and processing
Once you have created and added a Kajita to your website, when a customer enters their personal data into your Kajita, Kushki will return the information transformed into a token via a POST call to the URL indicated in the form used to initiate Kajita (the URL indicated in action).
{"authenticity_token": "lY_a952pCnhXZeTyXIYp1JYaFaSWnéLFiANOojCra6L?XO7ZQ7b12yiAvKgtvBepWCaPLyFESokPIRaSRDIw","cart_id": "123","kushkiToken": "6ce49238fa81427e8b206c9c7aac09d3","kushkiPaymentMethod": "card"}
Deferred payment data
If your merchant offers deferred payment options and the user has selected to pay in installments (months), you will receive additional parameters in the response along with the token. These fields indicate the number of installments and the selected deferred type.
Below is an example of the structure received when 4 months are selected:
{"authenticity_token": "...","cart_id": "123","kushkiToken": "c1a60f19e250417084aa4f3ee578f090","kushkiPaymentMethod": "card","kushkiDeferredType": "all","kushkiDeferred": "4"}
Charge creation
After receiving the token, it is time to continue the payment process from your back-end. To do this, you must invoke the indicated service, depending on the type of payment you want to make.
For example, in the case of one-time card payments, you must invoke the /card/v1/charges service using the received token and confirming the data with which the transaction was initiated. You can find more information at this endpoint.
curl --location --globoff 'https://api-uat.kushkipagos.com/card/v1/charges' --header 'Private-Merchant-Id: {{Public-Merchant-Id}}' --header 'Content-Type: application/json' --data '{"token": "6ced9218fa81437c8b20609C7aac09d1","amount": {"subtotalIva": 0,"subtotalIva0": 1000,"ice": 0,"iva": 0,"currency": "CLP"},"metadata": {"card_id": "123"},"fullResponse": true}'
Finally, you will receive a response indicating whether the transaction has been approved or declined.
 Chile
Chile Colombia
 Ecuador
 Mexico