Smartlinks
You can simultaneously receive payments from different channels, and modify the links in real time to adapt them to your needs
Process your payments in a simple, agile, and dynamic way. Use Smartlinks as a payment alternative to increase the reach of your commerce in digital media, such as chat rooms, messaging apps, social media, and even email.
What are the benefits you will obtain?
- More agile charges, since its simplicity makes the purchase process even easier for your customers.
- Greater visibility, since you can share them in different digital communication channels to guide your customers to the direct purchase of your products.
- Increase your sales by reaching a greater number of potential customers.
What features do they offer?
Simple: you can create and edit them easily to provide efficient solutions with a simple implementation.
Customizable: you can adapt them to your company’s needs without impediments.
Centralized: you can concrete information and manage your links from one place.
Secure: they have anti-fraud validation tools to reduce and manage the risk of your payments.
Versatile: you can configure them to accept multiple payment methods, such as cards, cash, and transfers.
Currently, our Smartlinks solution is available for some of the largest markets in America, such as Mexico, Colombia, Chile, Peru, Ecuador, and United States.
Here is how you can create a Smartlink from the Kushki Console.
1. Create a Smartlink
- From the Smartlinks screen of your Console, click on the + Create Smartlink button; a new screen will be displayed to configure your Smartlink.
- In the General Information section, describe the basic information of your product or service:
- Product Name: this will show up in the main screen of your Smartlink.
- Promotional Text: enter a brief description of your product or service.
- Product Description: enter the description of your product; this text will show up in the Smartlink you share.
- In the Modality section, select the type of available amount for your customers, Fixed Amount if you require to enter the exact amount of the product or service you are offering, and Open Amount ideal for when you need your customers to add the amount to be paid as they deem appropriate (donations, bets, etc).
3.1. If you choose the Fixed Amount option, in the Configuration of your payment methods section, the following fields will show up:
- Payment Type: select if it is a one-time payment, subscription, or combined. For One-Time Payment first you will have to enter the total payable amount for your product or service with or without VAT. While if you select Suscription or Combined, first you will have to select the periodicity (daily, weekly, fortnightly, etc), when you want to make the first collection if from the subscription or on a specific day of each month, if the number of payments are undefined or specific, and lastly enter the total payable amount of your product or service with or without VAT.
- Currency: it will be configured by default.
- Button Configuration: you will have to enter the name of the button if you want to, otherwise if you do not enter any amount, it will have as default the text Pay. If you leave it as default the amount will show up in the button, meanwhile if you enter the name of the button you will be able to select whether or not you show the transaction amount.
3.2. If you choose the Open Amount option, in the Configuration of your payment methods section, the following fields will show up:
- Payment Type: only One-Time Payment (card, cash, transfer, card async) will only be available.
- Associated Tax: select “yes” or “no”.
- Set an amount: you can set a minimum and maximum amount if required.
- Suggest an amount: you can propose a specific amount (this amount could be modified by the final customer). The purchase summary shown is associated with the Suggested Amount and the Associated Tax.
- In the Payment Method section, select the payment methods that you will have available for your customers, keep in mind that according to the type of payment you will find the following options: card, cash, or transfer.
Apple Pay Activation in Fast Payment Methods
You will find the option to enable Apple Pay just below the Payment methods selection, in the section named Fast card payment methods.
To enable it:
- Ensure you have selected the Card option in the previous step.
- Click the Apple Pay checkbox to enable it.
- In the Logo section, choose the image of your merchant that will be displayed in your Smartlink. At this stage you will be able to choose between the images you have previously uploaded in the creation of other Smartlinks, or upload a new one.
- From the Style and Structure section, define the visual appearance of your Smartlink.
- In the Programming section, define the number of uses and expiration time of your Smartlink. At this stage, you can also add a stopwatch that will only be shown if you choose a cover for your Smartlink.
- In the Terms and Conditions section, you can configure the terms and conditions that will apply to your Smartlink; you can select the default ones for your business or customize them according to the product.
- In the Dynamic Form section, you can create a form to obtain the data that you need from your customers, you can use our default template or start from scratch and add the fields you may need.
- Click on the Preview button to see the way your Smartlink will look like.
- When you are done with your changes, click on the Save button to save the changes of your Smartlink.
The video below will guide you through the creation process:
2. Share your Smartlink
To share a Smartlink with your customers, you only need to copy the URL we generated for you by clicking on Copy link. Once you have copied it, it will be ready to share it on the social media or network you may need.

3. Edit a Smartlink (Optional)
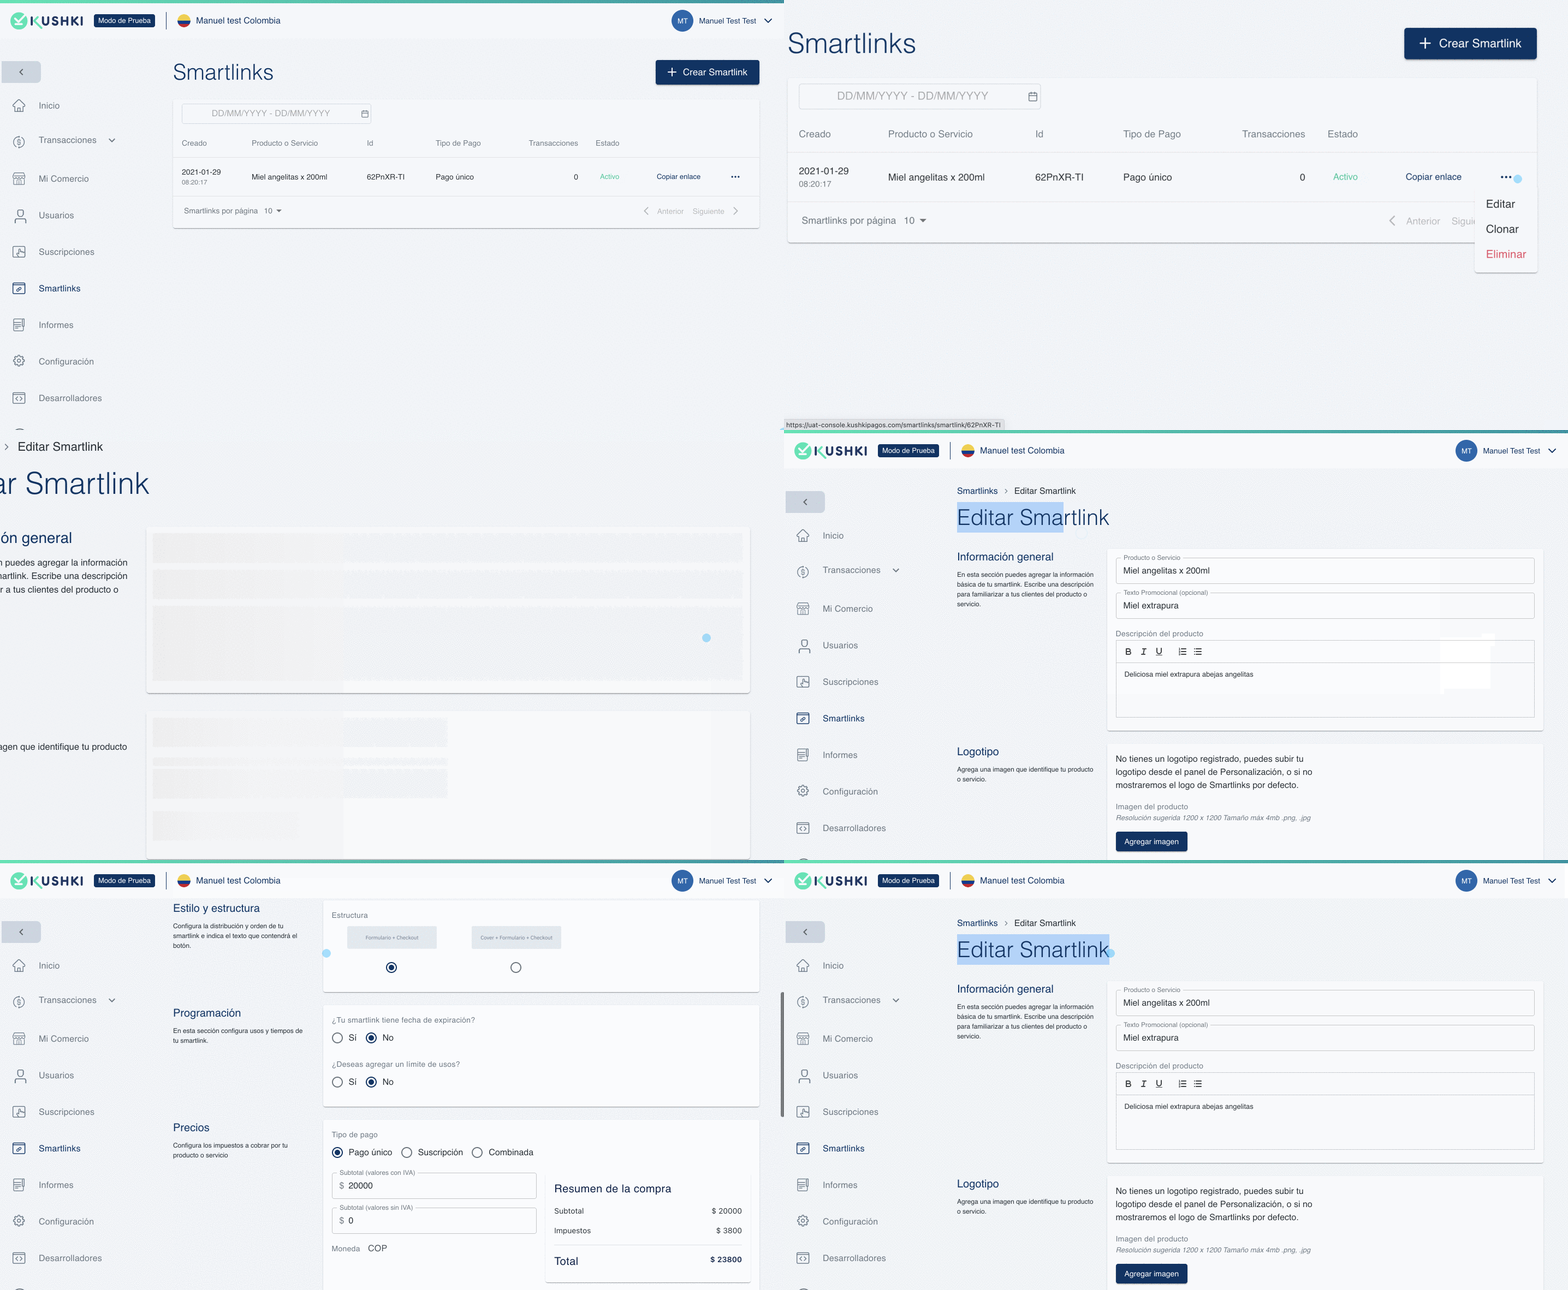
To edit any details in a Smartlink, go to the Smartlink you want to edit and on the right side you will find a button that will display a menu. Click on Edit.

With this, an edition form will be displayed, to edit any details that you need. Do not forget to click on Save, once you have finished your changes.
4. Clone a Smartlink (Optional)
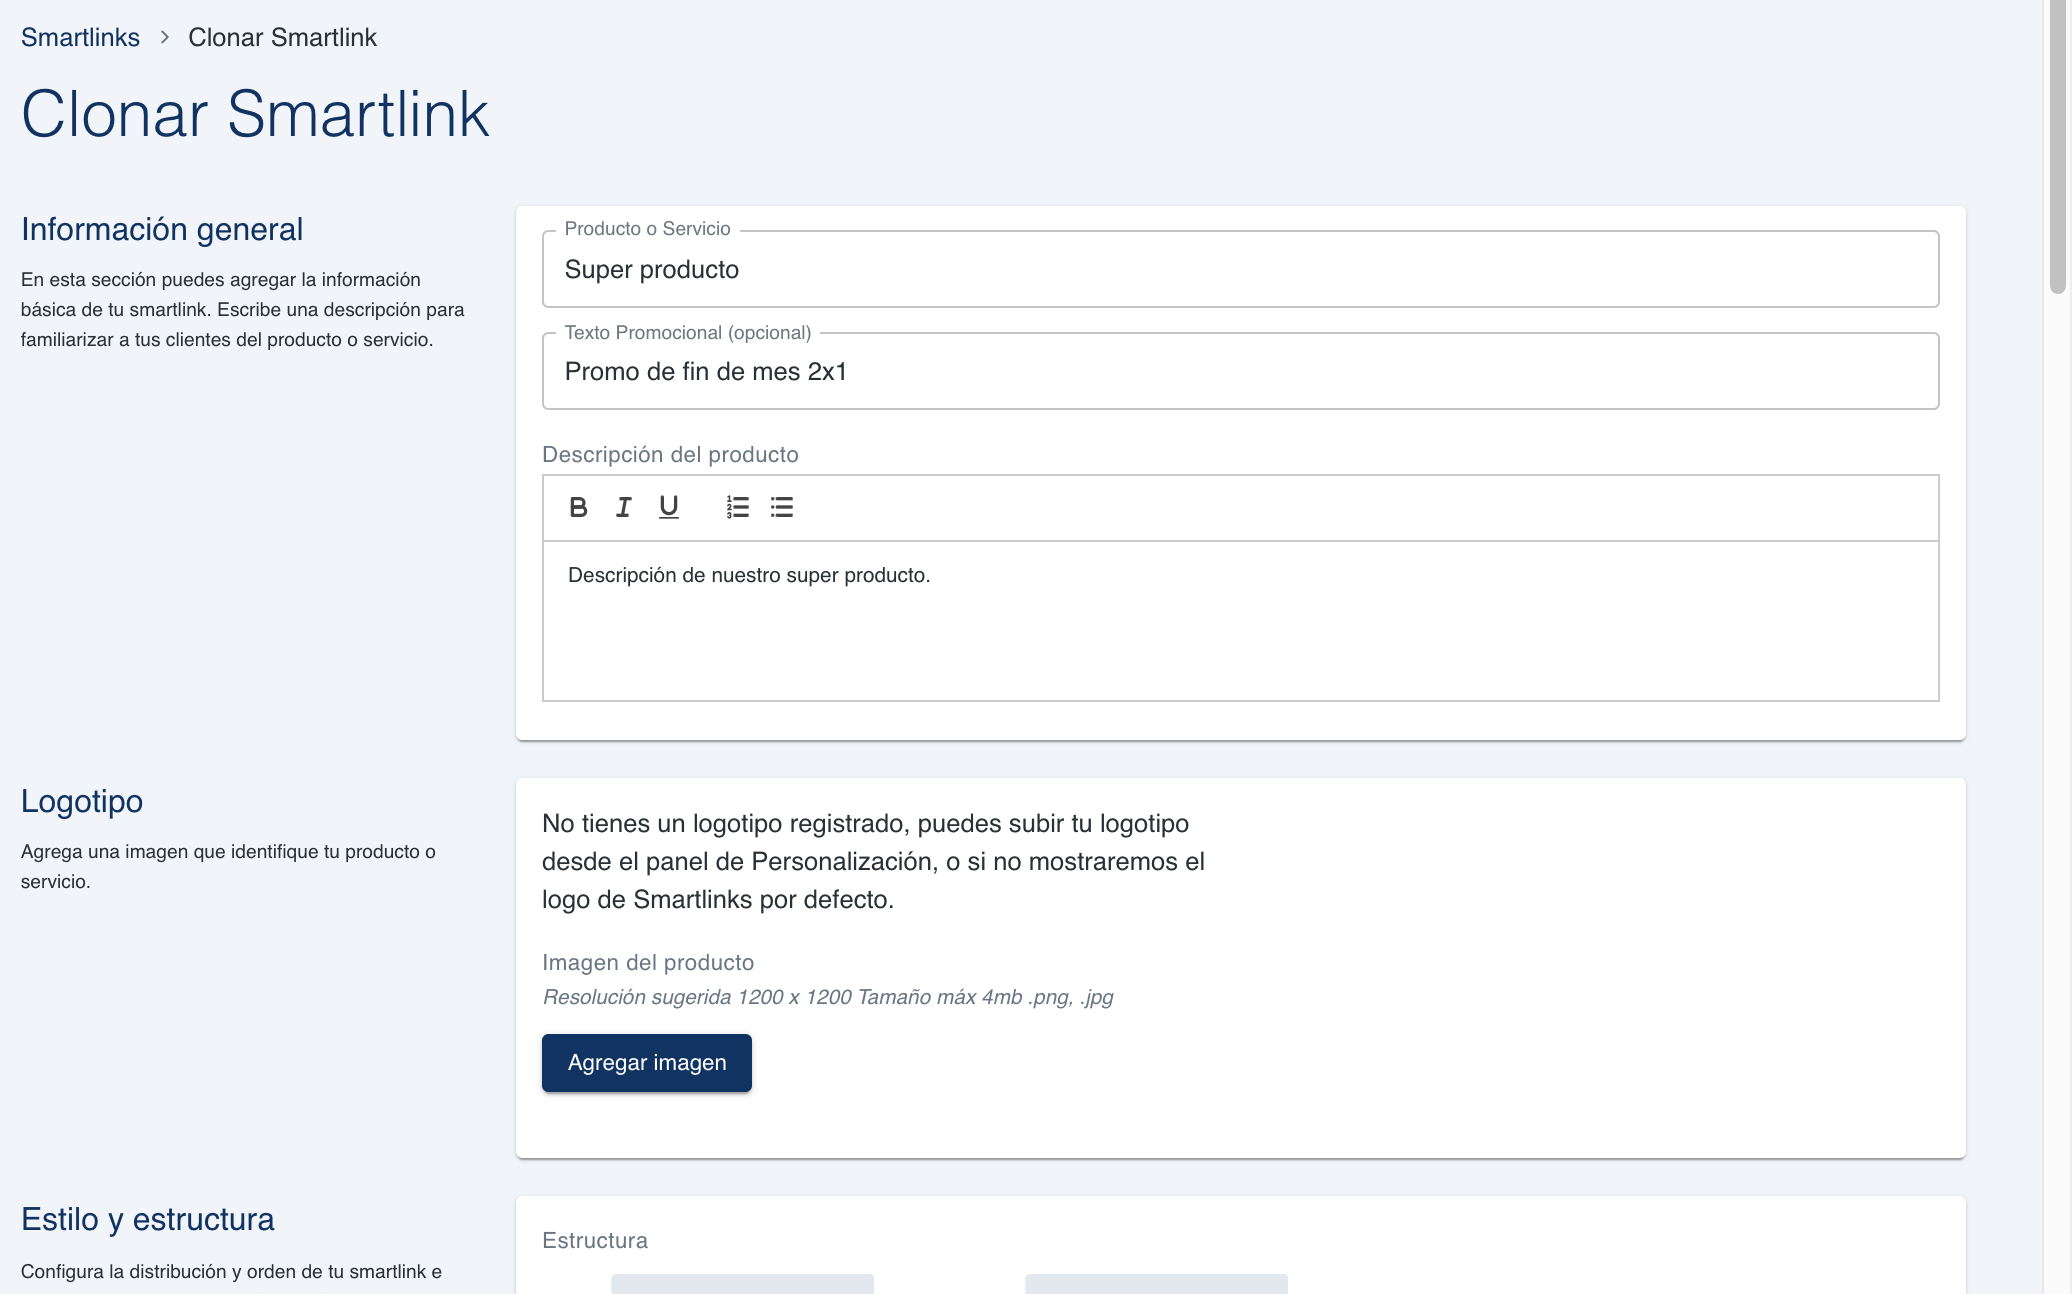
Since your time is money, we provide you the option for cloning a Smartlink, which will generate an exact copy of the Smartlink of your choice and this will save you the effort of generating one from scratch.
When you select this option, a creation form will be displayed with the same Smartlink options that you are cloning, in case you want to make any changes.

5. Delete a Smartlink (Optional)
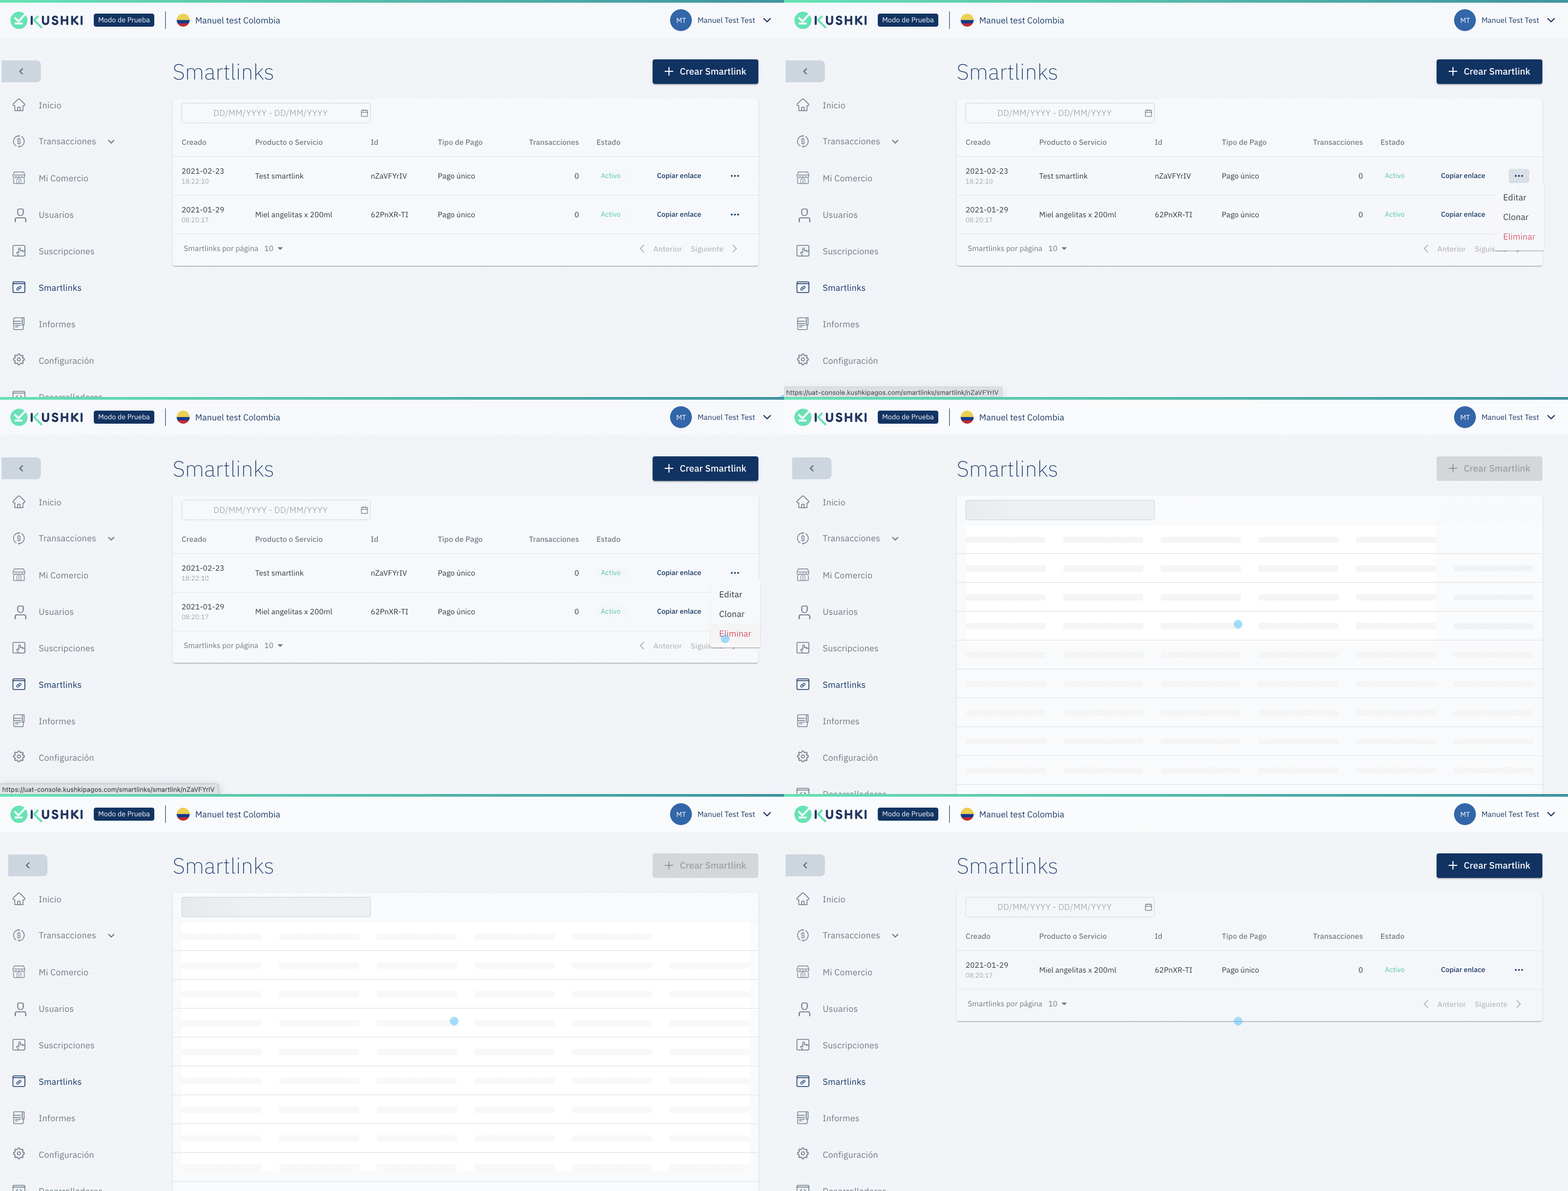
You can delete Smartlinks previously created from your Console. Click on the dropdown menu for a particular Smartlink. and select the Delete option. A confirmation message will show up, once you have accepted it, the Smartlink will be deleted.

 Colombia
 Ecuador
 Mexico
 Peru
Peru